Introduction to Event Tracking in E-commerce
Ever feel like you’re missing out on understanding what your Shopify customers are really doing on your store? You see the sales numbers, but what about all those little interactions before someone hits “Buy Now”? That’s where custom event tracking comes in – and it’s a game-changer for store owners who want to peek behind the digital curtain.
By the time you finish this article, you’ll know exactly how to set up powerful custom event tracking that shows you exactly how customers interact with your store. You’ll learn not just the technical steps, but also which events actually matter for growing your business. Ready to stop guessing and start knowing? Let’s dive in!
When running a Shopify store, understanding customer behavior is like having a superpower. Default Google Analytics 4 (GA4) tracking gives you basics like page views and purchases, but that’s just scratching the surface. It’s like trying to understand a movie by only watching the opening and closing scenes – you miss all the important stuff in between!
Custom event tracking reveals the gold: why cart abandonment happens, which product features get attention, and how people move through checkout. These insights directly impact your bottom line by showing you exactly where to make improvements.
Now that we understand why tracking matters so much, let’s get everything ready to implement it properly. You wouldn’t build a house without the right tools, right?
Prerequisites for Advanced Tracking
Before we jump into the technical details, let’s make sure you have everything you need. Think of this as gathering your ingredients before cooking a delicious meal of data insights!
![]()
- Active GA4 property with Shopify integration – This is your data collection hub that works specifically with your Shopify store
- Google Tag Manager (GTM) container – Think of this as your control center for managing all tracking without constantly changing your website code
- Shopify admin access – You’ll need permission to add code snippets to your store
- Basic understanding of Shopify’s Liquid templating system – Don’t worry, you don’t need to be a developer, but knowing the basics helps
Got everything on this list? Perfect! If not, take a few minutes to set up your GA4 property and GTM container – trust me, the small time investment now saves hours of frustration later.
Now that you have your tools ready, let’s connect everything properly. After all, even the best ingredients need the right recipe!
Configuring Base GA4 Setup for Shopify
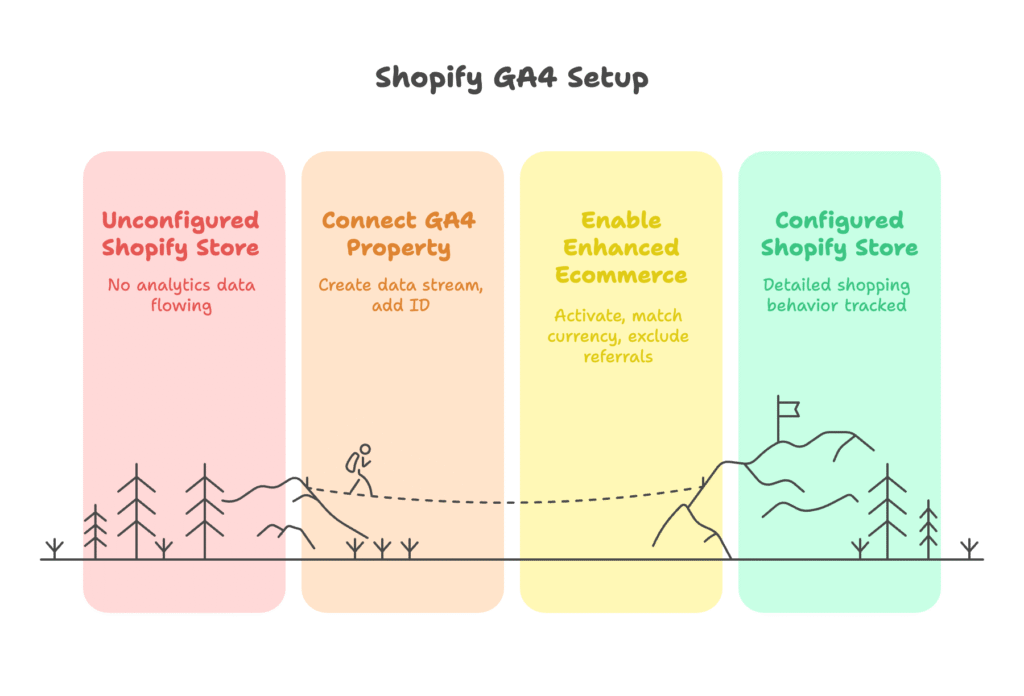
Connecting GA4 Property
First things first – we need to connect your Google Analytics 4 property to your Shopify store. This creates the basic pipeline for data to flow from your store to your analytics dashboard.
- Create a web data stream in GA4 – Log into your Google Analytics account, go to Admin > Data Streams > Add Stream > Web, and enter your Shopify store URL
- Get your Measurement ID – It looks like “G-XXXXXXXXXX” and is found under your data stream settings
- Add it to Shopify – In your Shopify admin, go to Online Store > Preferences > Google Analytics section and paste your Measurement ID
That wasn’t so hard, was it? But we’re just warming up – now let’s make sure we’re tracking all those important e-commerce activities properly.
Enabling Enhanced Ecommerce
Enhanced Ecommerce lets you see detailed shopping behavior, not just simple page views. Here’s how to turn it on:
- In your Shopify dashboard, find the “Use Enhanced Ecommerce” checkbox and make sure it’s activated
- Double-check that your currency settings in GA4 match your Shopify store – mismatched currencies create confusing reports!
- Set up your referral exclusion list to include payment processors like PayPal and checkout.shopify.com – this prevents these necessary redirects from breaking your customer journey data
Great job! You now have the foundation in place. But if you want insights that truly transform your business, we need to go deeper. Let’s build a framework for capturing those crucial customer interactions!
Custom Event Tracking Framework
GTM Implementation Strategy
Google Tag Manager is like a Swiss Army knife for tracking – it lets you add, modify, and remove tracking without touching your website code each time. Here’s how to set it up for Shopify:
- Container setup – Create a new GTM container and add your GA4 configuration tag
- Variable configurations – Create variables that capture Shopify-specific data like product IDs, prices, and cart contents
- Trigger types – Set up triggers for DOM Ready (when page elements load), Click Tracking (buttons, links), and Custom Events (special interactions)
Think of this as building the nervous system for your store – now it can sense when important things happen! But which events should you actually track? Let’s explore the most valuable ones.
Core Custom Events for Shopify
Not all events are created equal. These four categories will give you the most valuable insights about your customers’ shopping behavior:
Product Customization Tracking
Want to know which product features matter most to customers? Track these interactions:
- Engraving tool interactions – How many people use personalization options?
- Color/style selectors – Which options are most popular, and which ones might you consider discontinuing?
- Size chart engagement – Are size uncertainty issues potentially hurting your conversion rate?
Setting up tracking for these events is straightforward with GTM:
- Create a trigger that activates when someone clicks these elements
- Set up a GA4 event tag that sends data when the trigger fires
- Include parameters like product_id and option_selected to make the data more useful
Cart Behavior Analysis
The shopping cart is where purchase decisions hang in the balance. Track these moments:
- Multi-add events – When customers add multiple items at once (great for bundle opportunities!)
- Cart drawer interactions – Do people review their cart multiple times before checkout?
- Shipping calculator usage – Are shipping costs surprising your customers?
For example, to track shipping calculator usage:
- Create a click trigger targeting your shipping calculator button
- Build a GA4 event tag named “shipping_calculator_used”
- Add parameters like cart_value and customer_type (new vs. returning)
Checkout Process Optimization
The checkout is your money moment – even small improvements here can dramatically increase sales:
- Payment method selections – Which payment options do your customers prefer?
- Address validator usage – Are shipping address errors causing friction?
- Tax calculator interactions – Are tax surprises potentially causing abandonment?
Implementation note: Since Shopify’s checkout is hosted separately, you’ll need to use the Shopify checkout extension feature to add your GTM container to the checkout pages.
Post-Purchase Tracking
The journey doesn’t end at purchase – track these opportunities for additional revenue:
- Upsell modal engagements – How effective are your post-purchase offers?
- Loyalty program signups – Are customers joining your retention programs?
- Gift wrapping selections – How many orders include add-on services?
We’ve covered the essential events to track, but for stores with complex needs, let’s look at some advanced techniques that take your tracking to the next level!
Advanced Implementation Techniques
Dynamic Parameter Tracking
Basic event tracking tells you what happened, but dynamic parameters tell you exactly how it happened:
- Product IDs with variant handling – Track not just the product, but the specific variant (like size/color combination)
- Price tracking with currency conversion – Properly handle multi-currency stores for accurate revenue reporting
- Customer segment parameters – Differentiate between first-time visitors and loyal customers
Implementation tip: Use GTM’s built-in variables combined with custom JavaScript variables to capture these dynamic values automatically.
Cross-Domain Tracking
Modern e-commerce rarely happens on just one domain. Make sure you track the complete journey across:
- Third-party payment gateways – Don’t lose tracking when customers go to PayPal or other payment processors
- External review platforms – See how review site visits impact purchase behavior
- Inventory management systems – Track interactions with back-in-stock notifications
To implement cross-domain tracking:
- In GA4, go to Data Streams > Configure Tag Settings > Configure your domains
- Add all related domains to your tracking setup
- Make sure your GTM configuration passes the client ID across domains
Server-Side Tracking
Some events happen on the server, not in the browser. Don’t miss these important moments:
- Implementing via Shopify Functions – Use Shopify’s server-side capabilities for reliable tracking
- Order status updates – Track fulfillment, shipping, and delivery events
- Back-in-stock notifications – See how effective your inventory alerts are
Server-side tracking requires a bit more technical setup, but the reliability is worth it, especially for critical events like purchases and refunds.
Now that you’ve set up all this amazing tracking, how do you make sure it’s actually working? Let’s check our work!
Data Validation & Testing
Setting up tracking is one thing – making sure it works correctly is another. Here’s how to verify everything:
- GTM Preview Mode debugging – Use GTM’s preview mode to see exactly which tags fire (or don’t fire) as you navigate your store
- GA4 DebugView implementation – Enable DebugView in GA4 to see real-time event data
- Shopify test orders – Create test orders using 100% discount coupons to validate the complete purchase funnel
- Data freshness checks – Remember that GA4 data can take up to 48 hours to fully process – don’t panic if reports aren’t immediately complete
Pro tip: Create a simple testing checklist and run through it after any major store update or theme change to catch tracking issues early.
Great! You’ve verified your tracking works. Now comes the fun part – actually using all this wonderful data to improve your store!
Analyzing Custom Event Data
Data collection is just the first step – turning that data into insights is where the magic happens:
- GA4 Exploration reports – Create custom reports that focus on your specific business questions
- Custom funnel visualization – Build visual funnels to see where customers drop off
- Audience creation – Create targeted audiences based on behavior for remarketing
- BigQuery integration – For larger stores, connect GA4 to BigQuery for deeper analysis and longer data retention
For example, create a funnel visualization that shows:
- Product page views
- Product customization interactions
- Add to cart events
- Shipping calculator usage
- Checkout initiation
- Payment selection
- Purchase completion
This detailed funnel reveals exactly where customers get stuck, helping you prioritize improvements.
Even with careful setup, tracking issues can pop up. Let’s look at common problems and how to solve them!
Common Pitfalls & Solutions
Save yourself some headaches by watching out for these typical tracking challenges:
- Double-counting events – Use proper scoping in GTM triggers to prevent events from firing multiple times
- Data layer inconsistency – Standardize your data layer implementation across all pages
- Shopify theme update safeguards – Create a backup of your tracking code before theme updates
- GA4 sampling limitations – For high-traffic stores, use BigQuery exports to avoid data sampling issues
Quick fix for double-counting: Add a “Once per page” or “Once per element” firing limit to your GTM triggers.
You’ve put in all this work – now let’s make sure it keeps working well into the future!
Future-Proofing Your Setup
Analytics tools change, and your tracking needs to evolve too. Stay ahead with these practices:
- Monitoring GA4 updates – Subscribe to Google Analytics release notes to stay informed about new features
- Automated container backups – Set up regular exports of your GTM container configuration
- Quarterly tracking audits – Schedule regular reviews of your tracking setup to identify gaps
- AI-powered anomaly detection – Configure GA4’s anomaly detection to alert you to unusual patterns
Remember: The digital landscape never stops changing, so your tracking approach shouldn’t either!
Congratulations! You now have a comprehensive understanding of custom event tracking for your Shopify store. By implementing these techniques, you’ll gain insights that most of your competitors don’t have – giving you a significant advantage in optimizing your store for more sales and happier customers.
Quick tip: Looking to take your Shopify conversion rates to the next level? The Growth Suite app for Shopify helps increase your sales by intelligently tracking visitor behavior and offering personalized, time-limited discounts to hesitant shoppers. It’s the perfect companion to the custom event tracking you’ve just set up!
References
- Shopify Help Center: “Tracking Additional Google Analytics Events”
- Coursera: “How to Use Shopify Google Analytics”
- Marketlytics: “Google Analytics Enhanced Ecommerce Shopify Setup”
- Rocket CRO Lab: “Custom Events in GTM for Shopify”